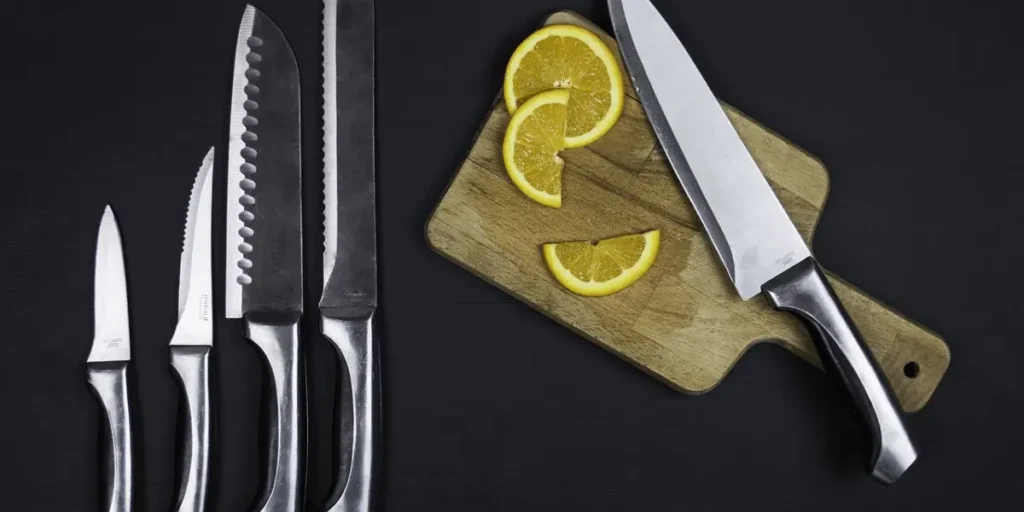
Types of Knife Sharpeners: Best Guide to Choosing the Right One, 2024

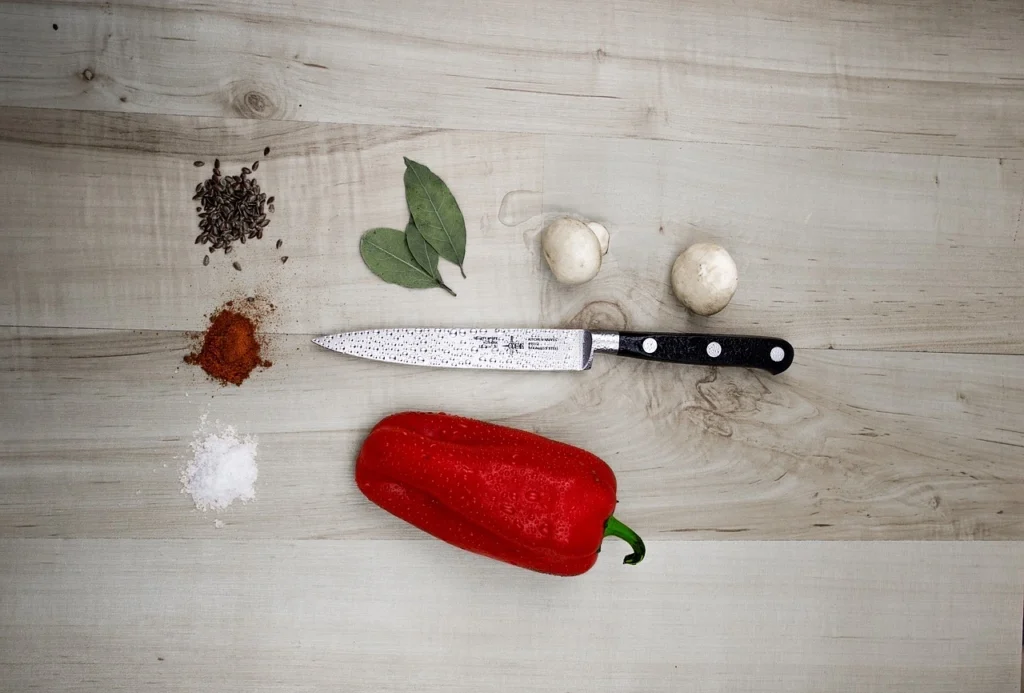
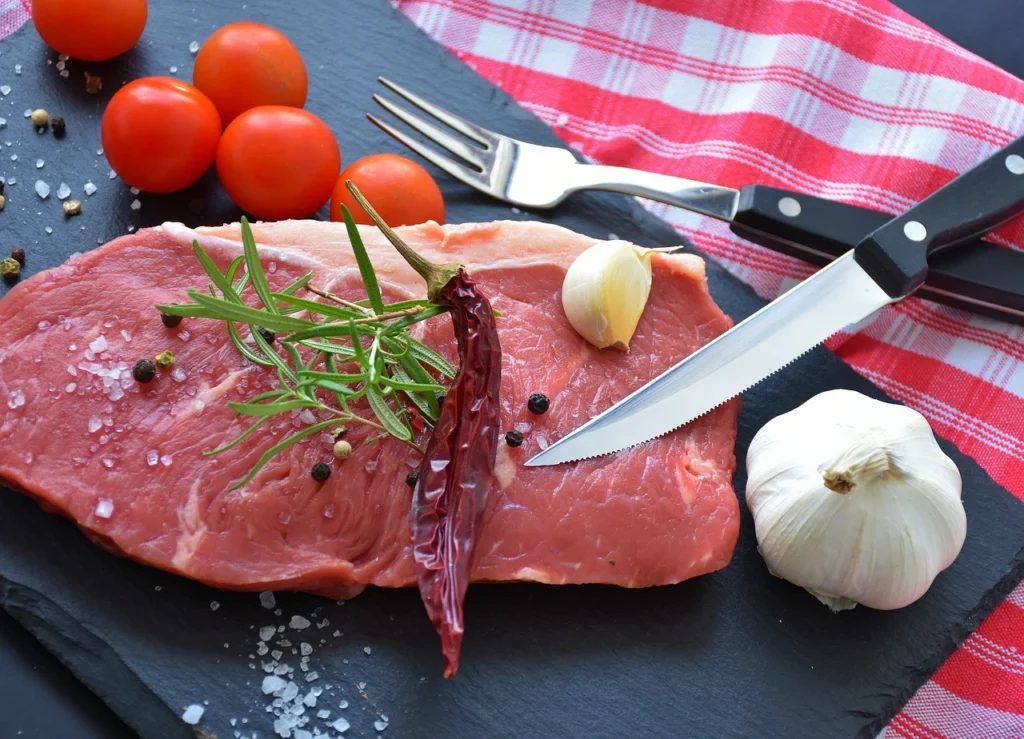
Maintaining your kitchen knives sharp is important as a way of cooking safely and effectively. With so many options on the market, it can be challenging to know which sharpener will meet your needs best. 

In this article, we'll explore the 10 main types of knife sharpeners, explaining how each one works and the benefits it offers.

10 Best Types of Knife Sharpeners 

Here are the best types.

1. Whetstones (Sharpening Stones)

One of the most traditional is the whetstone, also known as a sharpening stone. Whetstones are blocks made from abrasive materials like ceramic or natural stone and they help chefs improve and sharpen their knife skills.

To use a whetstone, you apply a thin layer of water or oil to the stone, then grind the knife edge against it at a consistent angle. This type of sharpener offers exceptional control and can restore even the dullest blades to a razor-sharp finish. However, it does require some practice to achieve optimal results.

2. Electric Knife Sharpeners

For those who prefer a more automated approach, electric knife sharpeners are a popular option among the types of knife sharpeners. These sharpeners use motorized abrasive wheels to sharpen the knife as you guide it through various slots. 

Types of Knife Sharpeners-Best Guide to Choosing the Right One 2024

Types of Knife Sharpeners-Best Guide to Choosing the Right One.

Most electric sharpeners offer multiple stages, from coarse grinding to fine honing, allowing you to customize the sharpness level. They’re convenient and quick, making them ideal for those with little sharpening experience.

3. Manual Pull-Through Sharpeners

Manual pull-through sharpeners are one of the easiest types of knife sharpeners to use. These devices typically feature two or three sharpening stages, where you pull the blade through slots containing different abrasive materials. 

While they may not provide the precision of a whetstone, they’re excellent for quick touch-ups and easy to use, even for beginners.

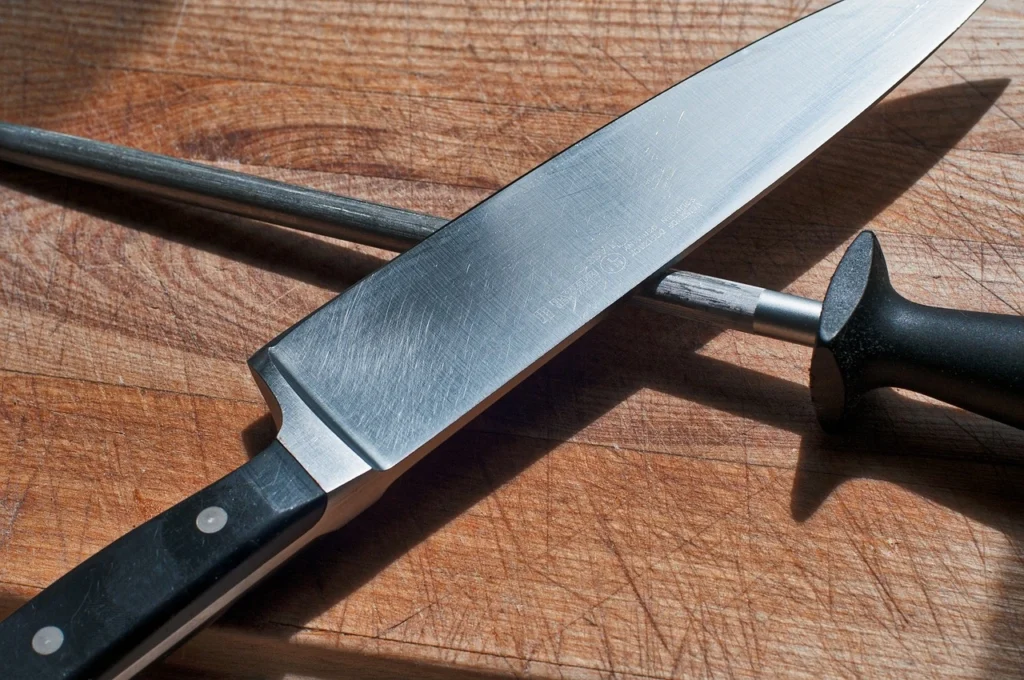
4. Honing Rods (Sharpening Steel)

Many people assume that honing rods also called sharpening steel, are one of the best, but technically, they’re used to hone rather than sharpen. 

Honing rods align the edge of the blade without removing any metal, which helps maintain sharpness between sharpenings. They’re ideal for regular use, especially with high-quality chef’s knives, to keep the edge aligned and ready to cut.

5. Ceramic Sharpeners

Ceramic sharpeners are specialised sharpeners that use a fine ceramic abrasive to hone the blade. Ceramic sharpeners are gentler than many other options, making them ideal for knives with delicate edges. 

They’re also effective at removing burrs and providing a fine finish, though they may not be as effective on extremely dull blades.

6. Diamond Sharpeners

Among the types of knife sharpeners, diamond sharpeners stand out for their efficiency and durability. These sharpeners use diamond-coated surfaces, which provide a highly abrasive, fast-cutting edge that can quickly restore sharpness to a dull knife. 

Diamond sharpeners are available in various forms, including handheld models, whetstones, and even electric sharpeners. They’re excellent for knives made from hard steel or ceramic, as they can handle these tough materials with ease.

7. Sharpening Systems

Sharpening systems are one of the more advanced offering a guided sharpening experience for precise results. These systems consist of an adjustable frame that holds both the knife and the sharpening stones at a specific angle, ensuring consistent contact with the blade. 
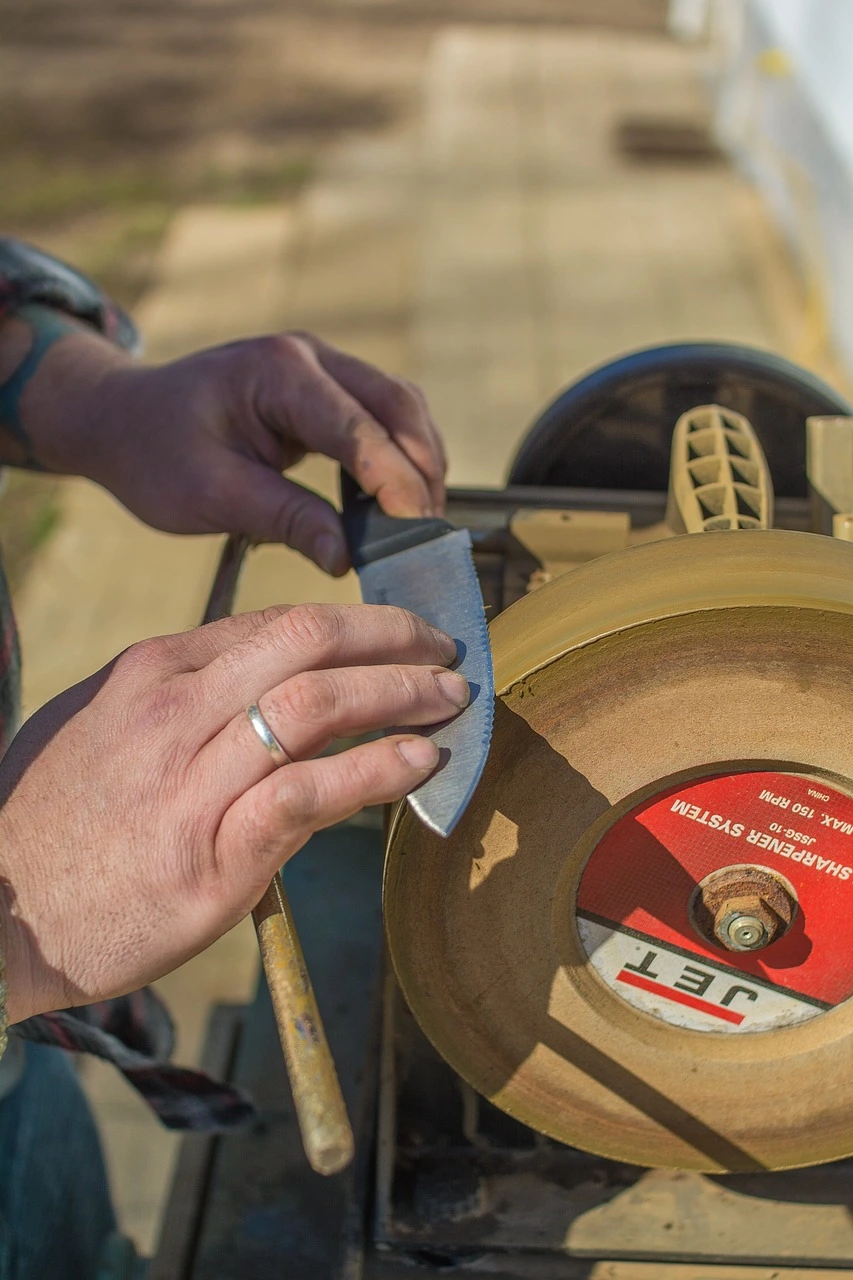
Types of Knife Sharpeners: A Complete Guide to Choosing the Right One

Sharpening Systems

Sharpening systems are a favourite among professionals who require exact precision, as they allow for perfect angle control and even sharpening.

8. Water Stones

Similar to traditional whetstones, water stones are specific sharpeners that use water as a lubricant rather than oil. These stones offer different grit levels, from coarse to ultra-fine, allowing for a multi-step sharpening process. 

Water stones are highly effective at creating a polished, razor-sharp edge and are often preferred by professional chefs and serious home cooks for their quality results.

9. Pocket Knife Sharpeners

Pocket knife sharpeners are compact types of knife sharpeners designed for portability. These small sharpeners are typically foldable or designed as small blocks with abrasive materials embedded in them. They are not intended for intensive sharpening but are ideal for quick touch-ups while on the go. 

Pocket sharpeners are often used by campers, hunters, and anyone who needs a quick sharpening solution in outdoor settings.

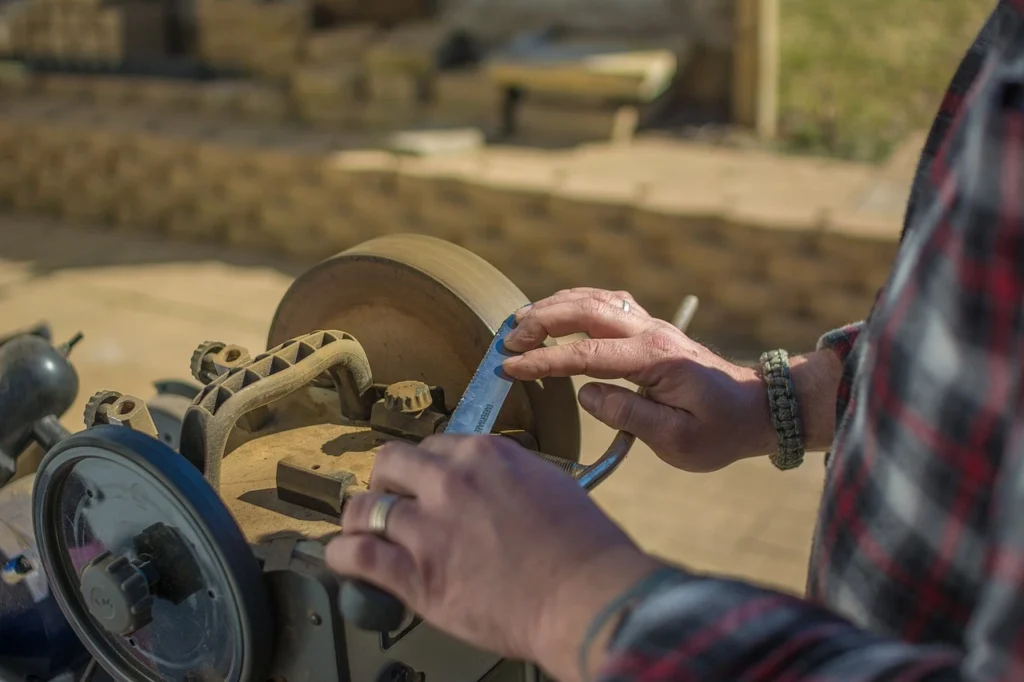
10. Knife Sharpening Belts

For a more industrial approach, knife sharpening belts are among the most robust. These sharpeners use a motorised belt covered in abrasive material to grind and polish the blade. 

They’re commonly used in professional kitchens and by knife makers, as they can handle heavy-duty sharpening tasks with speed and precision. However, they require more skill to use safely and are generally recommended for experienced users.

Why Knife Sharpeners Matter

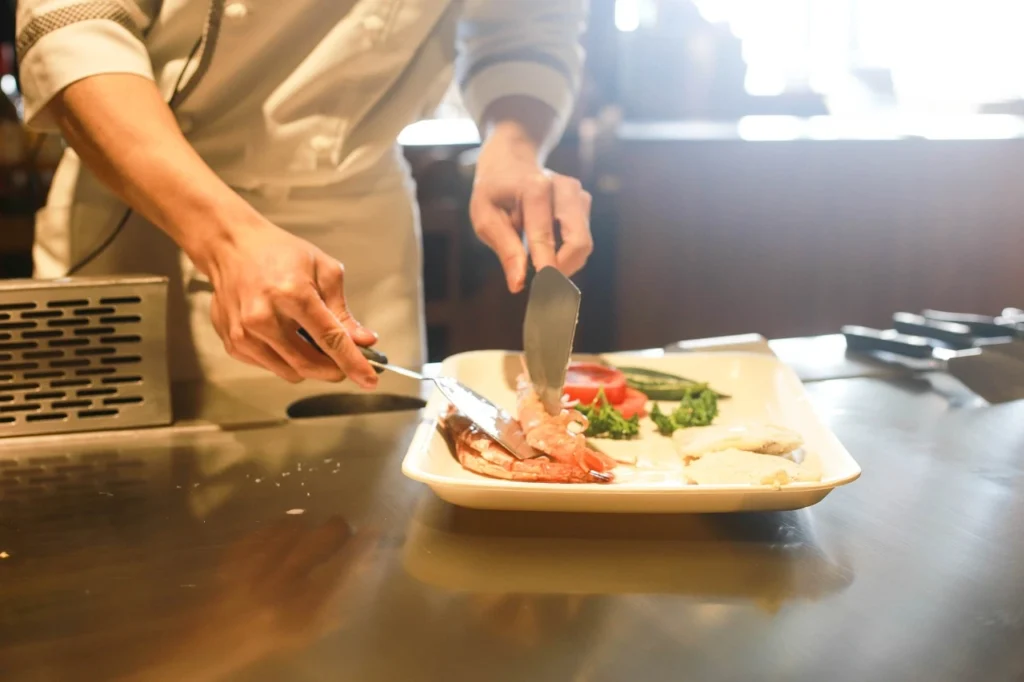
A sharp knife is essential in any kitchen, providing better control, precision, cut and safety. Dull knives are more likely to slip, causing accidental cuts, while a sharp knife lets you handle delicate ingredients with ease. 

Whether you’re an amateur home cook or a professional chef, understanding the various types available will help you maintain your knives properly and extend their lifespan.

How to Choose the Right Type of Knife Sharpener

When deciding between the types of knife sharpeners, consider your knife’s material, your experience level, and how frequently you use your knives. For example, a whetstone might be ideal for those with time and skill, while an electric sharpener may be better for a quick and easy solution.

Additionally, consider the hardness of your knife. Harder knives often respond better to diamond sharpeners and water stones, while softer knives can be effectively sharpened with manual pull-through sharpeners or ceramic sharpeners.

Maintenance Tips for Different Types of Knife Sharpeners

Proper maintenance of your chosen sharpeners will extend their lifespan and ensure they work effectively. For example, whetstones and water stones should be cleaned and dried after each use to avoid wear.

Electric sharpeners may require regular cleaning of the abrasive surfaces, while honing rods and diamond sharpeners can be wiped down with a damp cloth.

Keeping your knife sharpeners in good condition will ensure they provide consistent results, no matter what type you choose.

Why Having Multiple Types of Knife Sharpeners is Beneficial

It’s not uncommon for chefs and serious home cooks to have multiple knife sharpeners on hand. Each type has a specific purpose: a whetstone might be used for regular sharpening, while a honing rod keeps the edge aligned between sharpening sessions. For quick fixes, a manual pull-through sharpener may come in handy.

By understanding and using a variety of types of knife sharpeners, you’ll be better prepared to handle all kinds of knives and keep them in top condition.

Conclusion: Finding the Perfect Knife Sharpener for You

Choosing the right types of knife sharpeners can significantly impact your cooking experience, providing you with a sharp, safe, and reliable edge on your knives. Whether you choose a traditional whetstone, a high-tech electric sharpener, or a portable pocket knife sharpener, understanding how each option works will help you maintain your knives properly.


What kind of Classical Knife Cut should be used on Leafy Vegetables? Best Guide, 2024

Mastering knife skills is one of the most crucial things about a person entering the food industry. Being aware of what kind of classical knife cut should be used on leafy vegetables makes for a great presentation and delicious flavour in your meals. So, let's look at the best classical cuts to use and some tips and techniques for cutting leafy greens with perfect precision.

Understanding Knife Cuts: Why They Matter - What kind of Classical Knife Cut should be used on Leafy Vegetables 

There are different knife cuts used in the culinary world for various textures, flavours, and aesthetics like chef vs butcher knife. If you know the type of leafy vegetable to be used on a classical knife cut, you are going to be able to create visually pleasing dishes that are cooked very well and feature great flavours. Each cut is served to help the chef take control over how the flavours and textures combine.

What kind of Classical Knife Cut should be used on Leafy Vegetables? Best Guide, 2024

What kind of Classical Knife Cut should be used on Leafy Vegetables?

For leafy greens, the ideal knife cut would be a fine slice or chiffonade. Chiffonade is a cut that yields ribbons and thus is great for garnishing, salads, or wherever some vegetation adds freshness and a splash of colour to the dishes.

What is Chiffonade? The Perfect Knife Cut for Leafy Vegetables

What kind of classical knife cut should be used on leafy vegetables? The answer would probably be the chiffonade. It is a really old French cutting technique, in which you stack, roll, and slice leaves into very thin strips. Chiffonade is usually paired with basil, spinach, lettuce, or any other leafy green to present tender, ribbon-like cuts.

The chiffonade technique is best suited to be used on leafy greens because

Preparation for Making the Chiffonade Cut for Leafy Vegetables

Know the chiffonade cut one should use on the green-leaved vegetables. Here's how to do it according to step-by-step cuts to enhance your chef skills.

  1. Prepare the Leaves: Rinse and dry the leafy greens completely. Place several leaves on top of each other, with the biggest on the bottom.
  2. Roll the leaves: Tightly roll up the leaves, rolling along their length like a cigar. Rolling will help flatten the layers so you can slice them uniformly.
  3. Slice with Precision: With a sharp chef's knife, make thin slices along the rolled leaves. Make sure your slicing is thin, about 1/8 to 1/4 inch so that you get that chiffonade look.
  4. Unroll and Apply: Pull apart the sliced ribbons of the leafy vegetables and then apply them to your dish. This technique is particularly convenient for decorating soups, pastas, and salads.

From this, you should get lovely delicate cuts every time. Chiffonade stands as a good answer for what kind of classical knife cut should be used on leafy vegetables.

Other Knife Cuts for Leafy Vegetables

While chiffonade is preferred, some classical cuts are acceptable based on the dish. Here's a look at some alternatives for what kind of classical knife cut should be used on leafy vegetables.

Another simple knife cut is the julienne, which tends to produce long thin slivers, almost matchstick-sized. This cut is more often used on firmer vegetables but can be perfectly applied to leafy greens-the application being most practical for salads or wraps. It does demand a good steady hand and some precision, so it might best be used as an intermediate manoeuvre. 

For leafy greens such as kale or collard greens, perhaps a rough chop would be better than a chiffonade. That is much less dainty, and the pieces will all come out larger-than-chiffonade cut, which is marvellous in stir-fries, stews, and braised dishes.

Knowing what kind of classical knife cut to use on leafy vegetables is up to the recipe because different cuts lend themselves better to different textures and presentations.

Tips for Cutting Leafy Vegetables

Second, when choosing what style of knife cut to use on green vegetables, decide what the best cuts are on the greens to make them, and how to do it safely and effectively.

What kind of Classical Knife Cut should be used on Leafy Vegetables? Best Guide, 2024

Tips for Cutting Leafy Vegetables

  1. Use a Sharp Knife: A dull knife will compress tender leaves instead of slicing them cleanly. A sharp chef's knife is the ideal knife for getting a pretty, fine chiffonade.
  2. Keep Greens Fresh: Leafy vegetables can wilt quickly. Wash and dry them right before cutting, and store them properly to maintain their crispness.
  3. Control Your Slicing Pressure: With soft greens, gentle pressure is key to avoid bruising. A light touch ensures the greens remain vibrant and fresh. Also, make sure that you know when to clean and sanitise your knife.

Applying these tips will enhance your results when using any classical knife cut on leafy greens, ensuring beautiful and functional cuts every time.

Practical Uses of Leafy Vegetable Cuts

Knowing what kind of classical knife cut should be used on leafy vegetables is especially beneficial for specific types of dishes:

Of course, which type of classical knife cut to use on leafy vegetables depends entirely on the recipe. However, mastering those cuts can provide an extremely solid foundation upon which to base culinary creativity.

Choosing the Right Knife for Leafy Greens

To produce the perfect cut, you would require the right knife. Here is a guide for determining what kind of classical knife cut should be used on leafy vegetables.

  1. Chef's Knife: The best general-purpose knife for leafy greens, great for chiffonade and coarse chopping.
  2. Paring Knife: Good for smaller greens or detailed work on fragile leaves.
  3. Santoku Knife: It's a Japanese-style, thin-slicing knife that will work well for cutting leaves for chiffonade.

Being able to select the proper knife will mean you know what kind of classical knife cut should be used on leafy vegetables and you'll finish each task with precision.

Common Mistakes to Avoid When Cutting Leafy Vegetables

While it may be quite the point to know what kind of classical knife cut should be used on leafy vegetables it is equally crucial to know common mistakes that may affect the quality of your cuts. Some of these mistakes include:

  1. Them Being Subjected to Too Much Force: Leafy greens are very fragile and must be handled tenderly. Right force may cause bruising and tearing, which in turn may affect their appearance as well as freshness.
  2. Incorrect Knife Grip: It can make you lose control over cuts and so do many things. You should use a pinch grip. So that, your thumb and index finger of your hand can hold the blade just above the handle. The method provides a controlled grip and stability for even, smooth cuts.
  3. Not Drying Greens: If leafy vegetables are wet, they can be slippery, making them harder to control. Drying your greens thoroughly ensures a safer and cleaner cutting process.

Understanding these common mistakes and knowing what kind of classical knife cut should be used on leafy vegetables can help you avoid mishaps and achieve professional-quality results.

Storage Tips After Cutting Leafy Vegetables

Once you’ve perfected what kind of classical knife cut should be used on leafy vegetables proper storage becomes essential to maintain freshness and flavour. This is how to keep the cut leafy greens fresh with simple tips:

These storage tips will ensure that your leafy greens will remain fresh after you have decided on the type of classical knife cut that should be applied to the leafy greens.

Conclusion: What kind of Classical Knife Cut should be used on Leafy Vegetables?

Knowing what kind of classical knife cut should be used on leafy vegetables makes all the difference. This elevates your culinary creations simply by understanding how to achieve what type of cut on the classical knife.

Among the most popular cuts for leafy greens, the most delicate and attractive result with many purposes comes from the chiffonade cut. Others may serve as an alternative and add different kinds of textures or appearances to your meals, such as the julienne or rough chop.

Once you know the proper classical knife cut for leafy greens, you can better walk into the kitchen, secure in the knowledge that you have a whole range of possible ways to prepare fresh and beautiful dishes.

Home cooks and aspiring chefs will take obvious pride and benefit in being able to perfect these skills to enhance both the quality and presentation of the food prepared.

With this comprehensive guide, you can exercise and master what style of knife cut to use for leafy vegetables and acquire various skills in cutting with a knife in the kitchen.


Best Comparison Butcher Knife vs Chef Knife-2024

For any cook or chef, knives are some of the most essential tools in the kitchen. Choosing the right knife can make a significant difference in both efficiency, skill and the outcome of your dishes. To that end, in this article, we discuss Butcher Knife vs Chef Knife and how each knife is used for a different cooking task. 

We will be addressing the shape, purpose and functions of each knife as well.

Introduction to Butcher Knife vs Chef Knife: A Comprehensive Comparison

The Butcher Knife vs Chef Knife comparison begins with understanding the distinct purpose behind each knife’s design. The answer to the question of the difference between a butcher knife and a chef knife starts with the recognition of the differences in the rationale of the designs. 

Best Comparison Butcher Knife vs Chef Knife-2024

Best Comparison Butcher Knife vs Chef Knife

A butcher knife is primarily designed for cutting big sections of meat that is shearing the offal, boning and working on the fillet and other large cuts of meat without chipping the blade even when slicing the bones. 

A chef knife is less strong and is meant for a wider range of kitchen activities like dicing and shredding different vegetables and cutting smaller pieces of meat. When it comes to cooking, kitchen skills, and outcomes, there is great significance in knowing which knife to use and when.

When we consider the specific question of the difference between butcher knives and chef knives in the first place, we realize that it boils down to several factors such as the shape of a blade, sizes of blades, purpose, and ergonomics. Let’s examine each of those elements in more detail.

Blade Shape and Design: Key Difference in Butcher Knife vs Chef Knife

Let’s start with the first distinction, which is the blade's geometry of the Butcher Knife vs Chef Knife. The butcher's knife is rather large with a broad blade reminiscent of a cawing bird, made to direct its cut into large chunks of meat. Aside from that, the arc enables it to cut through fibres of muscles and even into the bones with much ease.

In contrast, the chef knife has a more balanced blade with a slight curve tapering to a pointed tip. This design is meant for a rocking motion, which it prefers for chopping, mincing, and dicing. The shape allows precision, making the chef knife more versatile throughout different types of food.

Best Comparison Butcher Knife vs Chef Knife-2024

Blade Shape and Design: Key Difference in Butcher Knife vs Chef Knife

To answer the question: How is a butcher’s knife different from a chef's knife? it is particularly important to note that both have a curved edge but appear to be different because the butcher knife cuts deep while the chef's knife seems widely designed for more precise work.

Blade Thickness and Durability in Butcher Knife vs Chef Knife

Another key point in the Butcher Knife vs Chef Knife is the difference in blade thickness. The butcher knife is much thicker and more robust since it is designed to break open hard meat and bone. Its heavy-duty blade can handle any strenuous work without losing its sharpness or bending.

A chef knife is thinner and less suitable for heavy work but great for very sensitive cutting and detailed work. Thinness, therefore, gives it greater control, and with that, a chef's knife can handle different ingredients as diverse as meat to vegetables. 

Understanding how is a butcher's knife different from a chef's knife can help you make the right choice depending on the task.

Intended Purpose: Butcher Knife vs Chef Knife

In the Butcher Knife vs Chef Knife comparison intended purpose plays a central role. A butcher knife is made to particularly process meat. It is implemented for services such as trimming off excess fat and even deboning and sectioning large cuts. 

On the other hand, a chef knife is an all-purpose knife built to allow for a variety of tasks in the kitchen from slicing meat and chopping veggies to dicing herbs and mincing garlic. 

That would make it an essential item in the home as well as a professional kitchen. For those wondering how is a butcher's knife different from a chef's knife, the chef's knife’s versatility across ingredients and precision tasks is a key distinguishing factor.

Handle Design and Comfort: Butcher Knife vs Chef Knife

Comfort is another important aspect of the Butcher Knife vs Chef Knife. The butcher knife handle happens to be typically stronger, offering a solid grip even when handling slippery, tough meats. Therefore, this design ensures that control is achieved in handling, thus minimizing the possibility of accidents when applying considerable force for large cuts.

The chef knife, however, is used for balance and control. An ergonomically shaped handle that helps in extended use when chopping, dicing and mincing may be required. For cooks who wonder, how is a butcher's knife different from a chef's knife? the answer lies in how each handle design supports different techniques and tasks.

Cutting Techniques: Butcher Knife vs Chef Knife: A Comprehensive Comparison

The Butcher Knife vs Chef Knife is also evident in the different cutting techniques each knife supports. The butcher knife is designed for straight, forcing cuts, allowing quite efficient possible breakdowns of the meat. Sections of considerable thickness and even tough cartilage may easily be sliced through with a curved blade like that of a butcher knife.

On the other hand, a chef knife is designed to create a rocking motion that allows the tip of the knife never to be lifted off of the cutting board while applying the rocking motion back and forth. 

This motion works exceptionally well for chopping and mincing and makes this knife even more versatile for precision work. When considering how a butcher's knife differs from a chef's knife, remember that the cutting technique each knife supports is a direct reflection of its design and purpose.

Versatility in Butcher Knife vs Chef Knife: A Comprehensive Comparison

There is no contest on versatility: the chef knife wins. The comparison between Butcher Knife vs Chef Knife allows one to know how versatile the chef knife can be cut above the rest as a multi-purpose tool for many kitchen jobs in the form of slicing, chopping, or dicing to achieve a variety of tasks. This may make it more practical for those with cramped spaces and just one utility knife is needed.

However, apart from meat processing, a butcher knife doesn't have so many applications. So far it's great for breaking down meat; however, if small cuts are necessary, that is not the tool to use.

When asked, how is a butcher's knife different from a chef's knife? the butcher knife’s strength is in handling large cuts, while the chef knife’s strength is its adaptability across different ingredients.

Conclusion: Butcher Knife vs Chef Knife

In this Butcher Knife vs Chef Knife: A Comprehensive Comparison, we’ve highlighted how each knife is distinct in terms of design, purpose, and application. An oversized, curved shape and heavier body design the butcher knife, making it suitable for some rougher kinds of meat-cutting work. It gives the strength and strength needed to split parts of meat and then smash bones.

An all-purpose kitchen tool, the chef knife has a well-balanced blade for executing precise cuts, mincing, slicing, and cutting of the many ingredients. For anyone who wonders how is a butcher's knife different from a chef's knife? it comes down to the intended use, blade thickness, and versatility.

Understanding the Butcher Knife vs Chef Knife: A Comprehensive Comparison empowers you to choose the right tool based on your cooking needs, ultimately improving your efficiency, safety, and results in the kitchen. Whether you’re working with large cuts of meat or preparing an array of ingredients, selecting the appropriate knife will make all the difference in your culinary experience.


Best Tips To Improve Your Knife Skills As A Chef- 2024

Mastering knife skills is part of the complete process of becoming an accomplished cook. Your sharpness, swiftness, and safety of cuts make your dishes appear perfect and great. Here are 5 Tips to Improve Your Knife Skills as a Chef that will smooth out cooking and increase efficiency for you. Now if you ever asked yourself, What's the best way to improve knife skills?

And we'll answer that as well, with sound, useful information that may lift your culinary game.

5 Tips to Improve Your Knife Skills as a Chef

Let's talk about the 5 tips that can help you improve your knife skills as a chef. 

Best Tips To Improve Your Knife Skills As A Chef- 2024

Best Tips To Improve Your Knife Skills As A Chef- 2024

1. Choose the Right Knife for Each Task

One of the most crucial 5 Tips to Improve Your Knife Skills as a Chef is understanding which knife to use for different tasks. Chefs use a variety of knives including steak knives. They include the chef’s knife, paring knife, and serrated knife and each serves a specific purpose. 

A chef’s knife combines many of the functions of other knives, even damascus and is used for the basic cutting of vegetables, and flesh, and general cutting duties. A paring knife comes in handy when one has to work on intricate details, say, for instance, surface peeling and trimming.

Using the right knife helps in more accuracy and safety. So, if you are asking What's the best way to improve knife skills, do not hesitate and begin with different types of knives. That way no matter the case, you will know exactly which knife to use for which cut making the cuts neater and simpler in execution.

2. Master the Grip

The way you grip your knife plays a huge role in control and safety. Grip techniques enhance stability and decrease power loss associated with the movements, which is why this grip is included among the other 

Best Tips To Improve Your Knife Skills As A Chef- 2024.

Master the Grip

To begin with, take the handle of the knife with the dominant hand then place the thumb and forefinger onto the two sides of the blade above the handle. This "pinch grip" gives you much better control.

A correct grip also keeps your hands safe, helping to prevent injuries. When wondering, What’s the best way to improve knife skills? Just remember that the proper grip is one of the best techniques, even a small change leads to significant improvement in control and cutting precision.

3. Use the Claw Technique for Safety

Protect your fingers by pulling inward toward you and putting your knuckles forward in the claw. It's one of the most important tips from 5 Tips to Improve Your Knife Skills as a Chef if you have received it as a gift as it cuts down on the chances of cutting yourself.

If you're still pondering What’s the best way to improve knife skills? implementing the claw technique should be a priority. It is very beneficial especially when working with people who do not use skills that entail chopping at very high speeds. 

The more you master how to use this technique, the better you will cut ingredients safely and even at faster speeds, meaning you can concentrate on how good the slice is with minimal chances of being injured.

4. Practice Consistent Cutting Techniques

Consistency, of course, is everything in the kitchen. Uniform cuts ensure that food cooks evenly, so that end dishes look more appealing and more professionally prepared. 

One of the 5 Tips to Improve Your Knife Skills as a Chef includes practising consistency and learning certain cuts such as julienne, chiffonade, and dicing.

Start with one type of cut and focus on it at a time. For instance, focusing your dicing on ensuring each cube cuts to the same measurement, you may ask yourself What is the best way to improve knife skills? and find different answers, but your technique will forever be consistent in size and shape. And as techniques become better executed, your speed and uniformity will improve your efficiency and visual appeal.

5. Prioritize Sharpness and Maintenance

A sharp knife is a safe knife, and therefore, maintenance is one of the most precious 5 Tips to Improve Your Knife Skills as a Chef. A dull knife has a high probability of causing slips and injuries because of a need for higher force for cutting. Know when to clean and sanitise your knife.

Sharpening and honing your knives frequently will keep them in their best shape; therefore, the work needed to cut on it reduces and becomes more precise.

If you’re still asking, What’s the best way to improve knife skills? Proper knife maintenance is a key component. Invest in honing steel to keep the edge aligned and professionally sharpen your blades for them to remain sharp. 

This will keep your knives performing well while helping you extend their lifespan, making every cut smooth and precise.

Additional Tips to Enhance Your Knife Skills as a Chef

Conclusion

Knife skills improve through patience and persistent practice it does pay back in the kitchen. This ranges from choosing the right knife and perfecting grip to practising claw and checking knife sharpness, you'll feel an immediate difference in your cooking with these 5 Tips to Improve Knife Skills as a Chef.

Remember, for those still wondering, What's the best way to improve knife skills? These basic tips are a good starting point. With commitment, you will find these 5 Tips to Improve Your Knife Skills as a Chef do not only make for safer cooking but also bring improvement in the quality of every dish you prepare.


What Is the Proper Method for Cleaning Dirty Utensils-Best Methods 2024

Maintaining a clean kitchen is essential for both food safety and efficient meal preparation. Knowing what is the proper method for cleaning dirty utensils helps ensure that all tools and surfaces stay free from bacteria, grease, and food residues.

In this article, we will discuss the proper technique of cleaning dirty utensils, with emphasis on how to best wash, dry and store the utensils. So let's find out what is the proper method for cleaning dirty utensils.

What Is the Proper Method for Cleaning Dirty Utensils?

Step 1: Pre-Rinse the Utensils

The first step in what is the proper method for cleaning dirty utensils is pre-rinsing. Pre-rinsing serves to get rid of loose food more effectively so that it becomes easier to scrub off baked-on deposits when it comes to washing. Pre-rinse using the following approach:

This is done to decrease the amount of scrubbing that is required and to keep all food debris from filling up your dish sponge or brush.

What Is the Proper Method for Cleaning Dirty Utensils-Best Method 2024

Pre-Rinse the Utensils

Step 2: Soak Utensils for Stubborn Residues

If there is food residue or grease that’s hard to remove, soaking is the next part of what is the proper method for cleaning dirty utensils. Soaking helps as well in removing food residues that stick on dishes:

This is useful when there are items that tend to have “baked on” food after use, such as – a spatula, ladle or knife.

Step 3: Scrub Thoroughly with a Dish Brush or Sponge

The next step in what is the proper method for cleaning dirty utensils involves thoroughly scrubbing each utensil. Put a little dish soap on the brush or the sponge. 

What Is the Proper Method for Cleaning Dirty Utensils?

Scrub Thoroughly with a Dish Brush or Sponge

Scrubbing is important in ensuring that all the utensils are free from bacteria and can be used again safely.

Step 4: Rinse with Hot Water

After scrubbing, the next step in what is the proper method for cleaning dirty utensils is rinsing with hot water. Hot water is useful in rinsing off the remaining soap and any food residue inside:

Be well disciplined when rinsing these types of utensils as soap deters the cleaning of other food when the utensils are used next time.

Step 5: Dry Utensils Completely

Proper drying is essential in what is the proper method for cleaning dirty utensils to prevent bacterial growth. Moisture can attract bacteria, making it crucial to ensure each utensil is thoroughly dry:

  1. Air-dry: Place utensils in a drying rack, allowing them to dry naturally. This method is ideal for larger items that are hard to towel dry.
  2. Towel-dry: For faster drying, use a clean, dry towel to wipe each utensil. Pay close attention to areas where water might collect, like the handles or seams.

This is especially important with wooden spoons or spatulas because the moisture absorbed causes the wooden spatula to warp and split over time. 

Step 6: Sanitize for Added Safety

Sanitizing is an extra step in what is the proper method for cleaning dirty utensils that enhances cleanliness and safety. Filling a bucket with hot water and adding a little bleach liquid (maximum 1 tbsp to 1 gallon of water) is advisable. 

This is not mandatory after every use. Otherwise, bacteria that may remain and are hard to see are gotten rid of by this process:

Step 7: Store Utensils Correctly

Proper storage is the final part of what is the proper method for cleaning dirty utensils. Storing utensils correctly keeps them clean and ready for future use:

They are helpful to prevent dust from getting on them, while also making sure the stored items are in good shape and ready for use in your next cooking.

Common Mistakes to Avoid When Cleaning Utensils

Now that we know what is the proper method for cleaning dirty utensils, let’s look at some common mistakes to avoid:

  1. Using Cold Water: Cold water makes it harder to remove grease, which can leave utensils still dirty. Always opt for hot water, as it’s more effective for cleaning and removing bacteria.
  2. Overcrowding the Sink: When too many utensils are soaked together, they can rub against each other, spreading grease or bacteria. Try to clean a few at a time for the best results.
  3. Using Old or Dirty Sponges: Sponges that are worn out or dirty can spread bacteria rather than clean. Replace sponges regularly to maintain a high level of cleanliness.

Avoiding these mistakes helps ensure that utensils are properly cleaned and safe to use in food preparation.

The Importance of Knowing What Is the Proper Method for Cleaning Dirty Utensils

Understanding what is the proper method for cleaning dirty utensils is crucial for maintaining a safe and healthy kitchen environment. To prevent cross-contamination and food-borne illness, as well as to achieve quality food preparation, clean utensils are paramount. Under these cleaning procedures, all kitchenware and equipment will be properly maintained, ensuring their availability whenever required.

Cleaning techniques/ practices come in handy in ensuring that the utensils are preserved for future use in a decent state. Cleaning utensils thoroughly, that is, washing, rinsing, drying, and sanitizing also helps in maintaining the kitchen which is an added advantage beneficial to cooking as well as to health.

Conclusion

In conclusion, knowing what is the proper method for cleaning dirty utensils is essential for every home cook. Kitchen health can also be achieved easily and simply by carrying out empty interventions including rinsing, soaking, scrubbing, rinsing, dry, sanitising and shelving the implements in the appropriate cabinets.

The provided measures eliminate damaging practices when cleaning therefore utensils remain in good condition, hence a safe cooking environment for you and your family.

It is also recommended that these cleaning regimes take a few more minutes of your spare time for better hygiene in the kitchen and hence clean safe meals. Clean utensils for every meal make a difference not only in the quality of food but also in the comfort available while preparing those meals.


How to Clean Solo Stove Exterior- Best Guide Of 2024

Falling under the category of bonfire stoves, Solo Stoves’ designs allow for all flame elements to stay protected and captivated in a full rotomolded enclosure making it a favourite among outdoor lovers.

Yet constant usage results in soot and ash build-up from inside, which stains the stove’s outer surface, therefore affecting its visual appeal and more importantly its durability.

Knowing how to clean Solo Stove exterior effectively ensures it stays in top condition, maintaining its aesthetic appeal and functionality. 

This guide will provide you with step-by-step instructions to restore the original lustre of your Solo Stove’s exterior while providing some basic maintenance and cleaning solutions that are safe for stainless steel.

Why It’s Important to Know How to Clean Solo Stove Exterior

With the innovative shaping of the Solo stove and effective incineration, this equipment gets its usage both for the yards and the dwellers. However, with time, some factors like smoke, ashes, steak knives and rain will tend to dirty the outer covering of that stove.

Knowing how to clean Solo Stove exterior not only maintains its sleek, stainless-steel look but also prevents long-term discolouration and corrosion. Regular cleaning can keep your Solo Stove looking as good as new and ready for your next outdoor gathering.

How to Clean Solo Stove Exterior: Step-by-Step Guide

For best results, do the following steps to clean the surface of a solo stove safely and properly.

How to Clean Solo Stove Exterior: A Complete Guide

How to Clean Solo Stove Exterior

1. Let the Stove Cool Completely

Before any other thing on how to clean Solo Stove exterior, ensure that the Solo Stove is at room temperature. This is important as washing the exterior while it is still hot may result in sustained burns and streaks forming on the stainless steel. 

Give it some time for that process to be completed and for the cleaning to be done efficiently and safely. Besides, do not forget that there should be no embers or ash remnants in the stove as they also present a fire hazard.

2. Use a Soft Cloth or Sponge

When learning how to clean Solo Stove exterior, one important tip is to avoid abrasive materials that might scratch the surface. Instead:

3. Apply a Mild Cleaning Solution

Do not use steel wool or any other rough scraping sponges, as they will spoil the polished surface of the stove. 

Mild soap cleans effectively without leaving harsh chemicals on the surface, which is essential in learning how to clean Solo Stove exterior properly.

How to Clean Solo Stove Exterior Stains and Discoloration

After some time, one may observe some changes in colour or stains on the outer side of the Solo Stove, especially if it is often in contact with high temperatures. Chameleon, also known as colour changing, the effect can be observed in stainless steel causing yellowish or bluish colouration. Here’s how to go about it: 

How to Clean Solo Stove Exterior

How to Clean Solo Stove Exterior Stains and Discoloration

1. Use White Vinegar Solution for Stains

Use a White Vinegar Solution for Stains. White vinegar is a great natural cleaner that offers no harm to stainless steel surfaces.

Vinegar helps to get rid of those hard stains and also aids in bringing back the original look of the Solo Stove.

2. Polish with Baking Soda Paste for Burnt Residue

The burnt part may be treated with a paste that is doughy and consists of baking soda that is safe to use and abrasive enough to remove burnt stains without leaving scratches. 

For this application, make a paste of dried powdered baking soda with a little water.

Equally, polishing using baking soda is a healthy but challenging way of cleaning off dirt without damaging the surface of the Solo Stove.

Final Steps for a Spotless Finish

After the cleaning has been performed to your satisfaction, you can complete the procedure with the following points:

1. Rinse and Dry Thoroughly

After removing all dirt, rinse the Solo Stove cleaned surface with water to get rid of soap, vinegar, or baking soda residues used previously and carry out a drying process using a soft dry towel. Leave the surface of the stainless steel stove wet, and it tends to be clouded surface-wise by water spots, hence why all the surfaces need to be dried properly. 

2. Apply a Stainless Steel Cleaner (Optional)

In case you want your Solo Stove to glow even more than it does already, you can use a stainless steel spray: 

There is a thin layer of protection provided by a stainless steel cleaner applied to the surface of the stove, which makes the cleaner removal of any stains very easy. Also, the next cleaning can be done without too much effort. However, the applicable cleaner must be heat resistant as some expensive stainless steel cleaning solutions are cheap and not fit for hot products.

Tips for Maintaining a Clean Solo Stove Exterior

Understanding how to clean Solo Stove exterior is essential, but maintaining it is just as important to keep it looking new. Here are some maintenance tips:

  1. Cover the Stove When Not in Use: A tarpaulin cover on the stove or its storage in the shed or garage may render it less prone to dirt stains and weather damage.
  2. Regular Dusting:  After each firing of the stove or even before it, dusting the Solo Stove from outside prevents dust from accumulating. Just a simple dry cloth cleaning post the usage of the stove helps prevent ash and soot from adhering to the surface.
  3. Avoid Harsh Chemicals: Supplements like washing liquids or dishwashing soaps and even vinegar and baking powder are okay but aggressive cleaning products can be detrimental, especially in their long-term usage which leads to the corrosion of the stainless steel walls.
  4. Minimize Water Exposure: Stainless steel may be rust-proof, however, over-exposure at a single instance may still give way to water streaks or spots more so if the cleaning is not done correctly. Make it a point to always wipe the external surface after cleaning.

Maintaining a clean exterior not only enhances the stove’s appearance but also contributes to its longevity, allowing you to enjoy outdoor gatherings around your Solo Stove for years to come.

Conclusion

In summary, learning how to clean Solo Stove exterior involves a few straightforward steps and some essential precautions. We can follow these tips for cleaning the Solo Stove without compromising its brand-new look inside out. Regular care with treatment that’s not abrasive allows the stainless steel to retain its original lustre and integrity. As all of the details on cleaning have been discussed, you’re ready to get your Solo Stove prepared for the next outdoor excursion.


Best Top five extra uses of steak knife you need to know- 2024

Given that steak knives are mainly meant for cutting through thick pieces of meat, they have the advantage of being applied for several other purposes both in the kitchen and out of it. 

The knives pack a long thin sharp edge in a reasonable size that allows them to be used for cutting jobs which require slightly more control. Here are the top five extra uses of steak knife you need to know to make the most out of this everyday kitchen tool.

Top Five Extra Uses of Steak Knife You Need to Know

Here are the top five extra uses of steak knife you need to know.

1. Cutting Vegetables and Small Fruits

One of the most useful and extra uses of steak knife you need to know is for cutting small vegetables and fruits. When you have to work with things like cherry tomatoes, strawberries, or radishes, a small, serrated edge of a steak knife helps cut them without crushing. However make sure you know how to care for you knives.

Its sharp tip also provides ease of operation in removing seeds or any blemishes of the flesh without causing damage to the skin of the flesh around.

Top Five Extra Uses of Steak Knife You Need to Know

Top Five Extra Uses of Steak Knife You Need to Know

Scaling of meat is another use of easy steal steak knives. For instance, sharper cutlery knives will enable sharpening its edge. They also take control to a finer extent as the tasks can be managed without a struggle due to the effort required and can be an alternative where a bigger chef’s knife is deemed excessive.

2. Art and Crafting Activities

Another top five extra uses of steak knife you need to know is in crafting DIY projects and gifting. Everything from the most basic of home decorations to every school project requires very sharp cutting tools and the dough knife sufficiently comes in handy due to its sharpness and sturdiness when it comes to cutting through its various materials. For example, it can cut clapboard foam and even thin plastic sheets, which is why it is very beneficial for hobbies that require multiple materials.

Top Five Extra Uses of Steak Knife You Need to Know

Art and Crafting Activities

Also, it is very appropriate for such activities where a little bit of force is required to be controlled, such as rope or twine cutting for outdoor activities, burrs’ wooden doweling trimming, or even flower decoration. This allows for comfortable use and penetration into thick, stringy, or solid materials due to the spiky edges that do not wear out as fast as a normal box cutter would.

3. Opening Packaging and Boxes

One of the most overlooked extra uses of steak knife you need to know is its effectiveness in opening packaging and breaking down boxes. 

To cut through plastic or cardboard boxes and the tape around them, the serrated edge of the steak knife works ideally. This makes it an effective tool for situations that require opening packages, cutting seals, or dismantling boxes for trash very fast. Make sure you have an understanding of when must a knife be sanitized and cleaned.

Top Five Extra Uses of Steak Knife You Need to Know

Steak Knife You Need to Know

A steak knife is very handy, especially when there are tough food packages, frozen vegetables, bags of rice, or hard kitchenware plastic containers that can be very difficult to open. A thin, steak knife has a sharp point which allows you to stab stubborn plastics and cardboard without any effort. It saves you the trouble of searching for a pair of scissors or using blunt knives that are not fit for the purpose.

4. Preparing Seafood and Small Cuts of Meat

Steak knives are not only for eating cooked meat, as they can also be of assistance in the preparation of raw seafood and other smaller meat cuts. For instance, when filleting a small fish or when trimming the fat of the chicken meat, a steak knife comes in handy because of its sharpness and is very effective for making very small cuts. This extra uses of steak knife you need to know that can make food prep easier and faster.

Again, because of their small, sharp blades, steal steak knives excel in detailed operations, like removing meat from the shell of the shrimp, cutting under the bone, or cutting through the thin slices of meats such as chicken breast or pork tenderloin. This is mainly because apart from making cooking steaks easier, steak knives are smaller than other kitchen knives therefore they are easy to control which is an advantage in carrying out these functions, particularly with slimy or historic commodities.

5. Creating Decorative Garnishes

Finally, one of the most creative extra uses of steak knife you need to know is for crafting decorative garnishes. A serrated edge on a steak knife can help bring out a better design on fruits, vegetables, and even cheese presentation stations by adding some creativity in textures to the garnishes. A steak knife can be used to etch patterns on a fruit’s skin, make spiral cuts on a cucumber or zucchini, or cut intricate figures on cheese.

Whether one is making garnishes for the cocktails, putting together a charcuterie centrepiece, or just trying to spice up the presentation of a plate, a steak knife can come in very handy. You can play around with various styles because it is sharp and has a fine edge to cut with, enabling you to create easy yet beautiful and complex garnishes.

Conclusion -Top Five Extra Uses of Steak Knife You Need to Know

Concerning cooking and serving utensils, the steak knife retains its practical edge even off the dining table ranging from food prep to do-it-yourself projects. Knowing these top five extra uses of steak knife you need to know will allow you to fully take advantage of this culinary essential by making it a more versatile kitchen tool instead of just using it for cutting steak. 

Packing materials, cutting up pieces of fruit, and garnishing a plate with more artistic elements all require a good quality steak knife that comes in handy and never fails.

Top 5 Ways To Care For Your Damascus Knives-Best Guide Of 2024

Damascus knives have inherent beauty in the attractive wavy patterns, which make them beautiful additions to any kitchen or collection. Special care needs to be taken for the knives made through the process of layered forging in different kinds of steel so that they do not become dull and rusty and preserve the gorgeous Damascus pattern.

Here are the top five ways to care for your Damascus knives, ensuring they remain sharp, rust-free, and still gleaming with brilliance after years of care and Maintenance of Damascus Knives.

Close-up of a Damascus knife with distinctive patterns. Alt text.

Top 5 ways to take care of your Damascus knives: Guide to step-by-step management

Top 5 Ways To Care For Your Damascus Knives

Top 5 Ways To Care For Your Damascus Knives

Make sure to follow these top 5 ways to take care of your Damascus knives. Ensure that you have an idea when should you clean your knives.

The Damascus knife requires to be cleaned after every use like a wood burned cutting board because the Damascus steel is not all stainless material and therefore may rust or tarnish if it is exposed for too long to moisture or acidic products.

To clean a Damascus knife properly:

Clean Damascus knives well to avoid the corrosion and build-up that can obscure the etching pattern applied and result in the beauty of Damascus knives. This step is crucial for care and Maintenance of Damascus Knives

Damascus steel, although tough, is susceptible to rust if not taken proper care of. Often oiling the knife blade will provide a protective coating that prevents moisture from reaching the blade and maintains its integrity.

To oil your Damascus Knife: 

Keep the blade of a knife lubricated, weekly for knives used daily or every clean for knives not being used as often. This will prevent rust and keep it looking fine. Oil more often if the ambient humidity is quite high. 

To Care and Maintenance of Damascus Knives, follow the third step. A Damascus knife should be kept sharp because an ignorant blade is much more deadly than a dull one. However, the arrangement of the structures of Damascus steel makes it such that only with proper techniques and tools of honing and sharpening the blade can the latter function properly.

Sharpening Honing resurfaced the honing edge to maintain the sharpness until sharpened. Ceramic honing rod- Use a ceramic rod instead of a steel, Damascus steel prefers a ceramic rod. Keep your knife at a constant angle of 15 to 20 and draw the knife down the rod multiple times on either side.

Proper honing and sharpening keep the blade keen and effective; in addition, no chip or wear develops anywhere it should not on the intricate layers of Damascus steel.

How to Store Your Damascus Knives - Top 5 ways to care for your Damascus Knives 

How to Store Your Damascus Knives - Top 5 ways to care for your Damascus Knives 

How to Store Your Damascus Knives - Top 5 ways to care for your Damascus Knives

Storage is very important in preserving the Damascus knives especially if you want to gift them. Should they fail to be stored well, they will be left dull, not to mention scratched; although, in that moist condition, it could rust.

Proper storage will keep your Damascus knives looking pristine. Moreover, it will keep them sharp and durable.

While Damascus knives are made to be powerful, hitting them against hard materials will just do nothing but dull their edge or even make a hole in them. To keep your knife sharp and working well:

Ways to take care of your Damascus knives - Alt text 

The right cutting surface can greatly increase the time that a Damascus knife can be kept sharp without being damaged, thus keeping it able to perform as well over time, says a cutter.

Damascus knives caring tips - Alt text 

Additional Care for Damascus Knives in the Long Run

In addition to these five main care steps, here are a few tips that will keep your Damascus knives in top condition over the long run. Follow these tips for Care and Maintenance of Damascus Knives.

Conclusion

A Damascus knife is a chameleon, requiring careful attention and constant care, but such care allows a knife to be passed down through generations with unadulterated beauty, sharpness, and integrity. 

Regular cleaning, proper oiling, careful sharpening, mindful storage, and the use of appropriate cutting surfaces are some of the practices that can ensure quality and unique patterning for your Damascus steel. By following these top five care methods, you’ll ensure that your Damascus knives not only perform well but also retain their stunning appearance, making them a functional piece of art in your kitchen.

How to Make a Wood Burned Cutting Board Food Safe: A Step-by-Step Guide-2024

Creating a wood-burned cutting board can be a rewarding DIY project, adding a personal and artistic touch to a kitchen essential. However, it’s crucial to make sure that the design on the cutting board is food safe so that it can be used for preparing meals without any risk of contamination. 

In this guide how to make a wood burned cutting board food safe. We wll go through the entire process of preparing, treating, and finishing a wood-burned cutting board to make it both functional and safe for food preparation.

Understanding Food Safety for Wood Burned Cutting Boards to Make a Wood Burned Cutting Board Food Safe

How to Make a Wood Burned Cutting Board Food Safe

Looking for answers for how to make a wood burned cutting board food safe? 

Well, when making a wood burned cutting board food safe, the primary goals are to seal the burned design, protect the wood from moisture and bacteria, and prevent any harmful substances from coming into contact with food. The right sealing and finishing steps will help create a protective barrier, enhancing the board's durability and keeping the burned design intact. Using non-toxic, food-grade materials is key to ensuring safety and longevity.

How to Make a Wood Burned Cutting Board Food Safe

Step 1: Select the Right Type of Wood 

The first step to making a wood burned cutting board food safe is choosing the correct type of wood. Hardwoods like maple, walnut, and cherry are commonly used for cutting boards because of their durability and natural resistance to bacteria. These woods are dense, which minimizes moisture absorption and prevents cracking or warping over time.

  1. Maple: Known for its hardness and fine grain, which is less likely to absorb moisture.
  2. Walnut: A dark hardwood with natural antimicrobial properties, perfect for an artistic look.
  3. Cherry: A softer hardwood with a warm tone, suitable for decorative wood-burning designs.

Avoid softwoods like pine or cedar, as they are more porous and prone to damage when used for cutting boards. It's the crucial step on how to make a wood burned cutting board food safe.

Step 2: Sand the Cutting Board for a Smooth Surface

Before wood-burning the design, make sure the surface is smooth to ensure both ease of burning and safety. Sanding removes any rough spots and splinters that might trap bacteria or be uncomfortable to work with.

  1. Start with coarse sandpaper (around 120 grit) to smooth out any rough areas.
  2. Progress to finer grits (220 grit and above) to achieve a smooth, polished surface.
  3. Wipe off any sanding dust with a damp cloth before moving on to wood burning.

A smooth surface helps the wood-burning tool glide easily, making it easier to create a clean, precise design. It's the second step on how to make a wood burned cutting board food safe.

Step 3: Create Your Design with Wood Burning

Now it’s time to add your design! Here are some tips to ensure the process goes smoothly and safely:

  1. Sketch the Design: Lightly sketch your design on the cutting board with a pencil. This provides a guide and minimizes mistakes.
  2. Use a Pyrography Tool: Carefully burn the design onto the wood using a pyrography tool. Make sure the tool is at the right temperature and always follow the wood grain to prevent splintering.
  3. Avoid Deep Burns: While it’s tempting to create deep, dark burns for contrast, too much burning can weaken the wood. Keep the burn lines shallow to preserve the board's durability.

Once the design is complete, allow the board to cool and then gently sand the surface again with fine-grit sandpaper to remove any rough edges or charred wood fragments. It's the third step on how to make a wood burned cutting board food safe.

Step 4: Clean the Cutting Board Thoroughly

After burning, it’s essential to clean the cutting board to remove any residue from the burned areas. This step is critical for making the wood burned cutting board food safe:

  1. Use a soft brush to remove any remaining charred particles from the burned areas.
  2. Dampen a cloth with warm water and gently wipe down the entire board.
  3. Allow the board to dry completely before proceeding to the finishing stage.

Cleaning the board removes any residual soot or dust that may interfere with the application of a food-safe sealant. That's the fourth on how to make a wood burned cutting board food safe.

Step 5: Apply a Food-Safe Sealant

Sealing the board protects both the wood and the burned design, preventing moisture from seeping in and preserving the artwork. Only food-safe oils and finishes should be used for a cutting board that will come into contact with food.

  1. Mineral Oil: A popular and inexpensive option, food-grade mineral oil penetrates the wood, providing protection without altering the wood’s natural look. Pour a small amount of oil onto a cloth and rub it into the board, making sure to cover all areas.
  2. Beeswax and Mineral Oil Blend: This mixture offers a more durable finish, sealing the wood while enhancing its natural beauty. Apply the blend in the same way as mineral oil and buff it with a cloth to bring out a soft sheen.
  3. Pure Tung Oil: Derived from nuts, pure tung oil hardens upon drying, offering a long-lasting, water-resistant finish. Make sure to use 100% pure, food-safe tung oil and allow each coat to cure completely before applying the next. 

Application Process:

That's the fifth on how to make a wood burned cutting board food safe.

Step 6: Let the Cutting Board Cure

After applying the sealant, let the cutting board sit for a few hours or overnight to allow the finish to fully absorb. Curing is important in ensuring the board is fully protected and ready for safe food use.

  1. For mineral oil, a few hours is usually sufficient.
  2. For tung oil, curing may take a full 24 hours, depending on the wood’s absorption rate and the oil’s drying time.

Once cured, the cutting board will have a smooth, natural-looking finish that protects the wood and keeps the burned design intact. That's the 6th on how to make a wood burned cutting board food safe.

Step 7: Maintain Your Food-Safe Cutting Board

Now that you’ve learned how to make a wood burned cutting board food safe, it’s important to maintain it. Regular care will keep the board in excellent condition and prevent the sealant from wearing down.

  1. Regular Oil Application: Reapply food-safe oil or wax every few weeks, depending on usage, to maintain the board’s protective barrier.
  2. Hand Wash Only: Avoid soaking or putting the board in the dishwasher, as this can cause warping and damage.
  3. Use a Mild Dish Soap: After each use, hand wash with mild soap and warm water, and dry immediately with a clean towel.
  4. Sanitize with Vinegar: For extra cleanliness, wipe the board down with a solution of equal parts white vinegar and water. Vinegar is a natural disinfectant and is safe for wood. And that's the last on how to make a wood burned cutting board food safe.

Tips on How to Make a Wood Burned Cutting Board Food Safe

How to Make a Wood Burned Cutting Board Food Safe

Here are some additional tips to keep in mind when making a wood burned cutting board food safe:

Conclusion

By now you have the answers on how to make a wood burned cutting board food safe. Making a wood burned cutting board food safe is a rewarding project that requires attention to detail and the use of high-quality, food-safe materials. By choosing the right wood, applying a durable design, and sealing the board with food-safe oils, you can enjoy a beautiful, personalized cutting board that’s also practical for everyday use. Regular maintenance will help the board retain its protective finish, keeping it both functional and decorative for years to come.

With proper care, your custom wood-burned cutting board will remain a unique and safe addition to your kitchen, combining style and function in a way that stands out.

Read Also This: Etiquette When Giving a Knife as a Gift: A Comprehensive Guide-2024


Etiquette When Giving a Knife as a Gift: A Comprehensive Guide-2024

Giving a knife as a gift can be a powerful gesture, rich with cultural meanings and traditions. Across different societies, knives are often associated with strength, respect, and protection. However, they also carry unique superstitions, often symbolizing separation if not gifted properly. To avoid any misunderstandings and ensure a positive reception, it’s essential to understand etiquette when giving a knife as a gift

In this article, we’ll explore the cultural symbolism, gift-giving etiquette, and research around this tradition to help make your gift meaningful and respectful.

Why Give a Knife as a Gift? What is Etiquette When Giving a Knife as a Gift?

Etiquette When Giving a Knife as a Gift

To fully appreciate etiquette when giving a knife as a gift, it’s helpful to first understand the cultural and symbolic meanings behind gifting a knife. Knives are traditionally given to mark significant life moments, such as weddings, birthdays, or career milestones, and often carry unique meanings that make them memorable.

A study in The Journal of Material Culture examined the significance of gifting tools, including knives, in rural European communities. Researchers found that knives symbolize not only strength and protection but also mark the transition to new phases in life. When presented as gifts, knives may symbolize the wish for strength, resilience, and even loyalty, which makes the etiquette around them especially important to follow.

Understanding Superstitions and Symbolism

While knives are respected as symbols of protection, they also have superstitions tied to them. In various cultures, gifting a knife without observing specific etiquette can symbolize “cutting” the relationship. For instance, Scandinavian and Eastern European customs often consider giving a knife as a potential omen of separation or discord if certain gestures are not made to “neutralize” this belief.

A cross-cultural study published in The European Journal of Folklore highlights the importance of recognizing local traditions and beliefs, as well as practising appropriate etiquette, to avoid offending or worrying the recipient. This makes etiquette when giving a knife as a gift crucial, as it helps prevent misunderstandings and superstitions from overshadowing the good intentions behind your gift.

Essential Etiquette When Giving a Knife as a Gift

To navigate these traditions thoughtfully, here are essential practices to observe for proper etiquette when giving a knife as a gift:

Include a Coin with the Gift Etiquette - First Etiquette When Giving a Knife as a Gift

A common tradition in many cultures is to include a small coin with a knife gift. The recipient then “pays” the giver with this coin, symbolically buying the knife rather than receiving it as a gift. This custom is believed to prevent any separation associated with gifting a sharp object.

Recipients who followed this ritual often felt more positive and assured, as it added a sense of reciprocity and respect. This simple exchange can ease any worries about the knife's symbolic sharpness, ensuring that the gift is seen as friendly and meaningful.

Explain the Gift’s Meaning - Second Etiquette When Giving a Knife as a Gift

Giving a knife without context can lead to mixed emotions, especially if the recipient is unfamiliar with the tradition. When giving a knife, consider explaining why you chose it and what it symbolizes. For example, you might mention that the knife represents protection or strength, especially if it’s a high-quality chef's knife or pocket knife with sentimental value.

By clarifying your intentions, you can deepen your connection and help the recipient see the knife as a meaningful gesture rather than a potential omen.

Select the Right Knife for the Occasion

Choosing an appropriate knife is also part of proper etiquette when giving a knife as a gift. Different knives serve different purposes, so the type of knife you select should align with the occasion and the recipient’s interests. For instance, a well-crafted chef’s knife can be an excellent choice for a friend passionate about cooking, while a quality pocket knife might suit someone who enjoys outdoor activities.

In a survey conducted by Gift Giving Quarterly, 78% of recipients appreciated gifts that were personally relevant to their hobbies or lifestyle. This demonstrates the importance of selecting a knife that reflects the recipient’s tastes and preferences, ensuring it’s both useful and appreciated.

Wrap the Knife Thoughtfully

Thoughtful wrapping adds a layer of care to your knife gift. Avoid giving the knife in its bare form; instead, wrap it carefully in a box, cloth, or gift wrap. Presenting a knife in this manner signifies respect and consideration, adding to the gift’s value.

Unique Situations to Consider with Knife Gifting

Etiquette When Giving a Knife as a Gift

Certain circumstances call for extra attention to etiquette when giving a knife as a gift, such as weddings or housewarmings. In these situations, you may need to go beyond traditional gestures to convey your well-wishes fully.

Weddings

Giving a knife as a wedding gift can be especially symbolic but also requires careful etiquette. Knives at weddings can signify strength and resilience, though some traditions consider them an omen of separation if not gifted with care. Including a coin and a note explaining the symbolic meaning can help convey the positive intent behind the gift.

According to a cultural analysis in The Journal of Marriage and Symbolism, societies that practice traditional wedding customs often regard knives as sacred or significant objects, embodying both power and caution. This reinforces the importance of explaining the knife's meaning and observing traditional gestures when gifting a knife to a newlywed couple.

Housewarmings

For housewarming occasions, a knife symbolizes protection and self-sufficiency. A quality kitchen knife, for instance, can be a practical and thoughtful gift, especially if the recipient enjoys cooking. Again, including a small coin and explaining your intentions shows respect for any beliefs around etiquette when giving a knife as a gift.

In a study on gift-giving practices in Home and Family Sociology, recipients who understood the symbolic meaning of their housewarming gifts felt a deeper connection with the giver, especially when practical items like knives were gifted with thought and care.

How to Handle Knife Gift Reactions

Even when observing etiquette when giving a knife as a gift, the recipient may be taken aback or hesitant. Here are ways to handle such reactions thoughtfully:

  1. Reassure Them of the Tradition: If the recipient is concerned, gently explain the tradition of giving knives and why you included a coin, showing that you respect cultural beliefs and want the gift to be seen as positive.
  2. Offer an Alternative Gift Option: If they still seem unsure, consider offering an alternative gift or additional options, such as a gift card, which can allow them to choose something themselves.
  3. Acknowledge Their Concerns: Respect the recipient's feelings, even if they prefer not to accept the knife. Gift-giving is about respecting personal comfort and preferences as much as following etiquette.

Conclusion

Understanding etiquette when giving a knife as a gift is essential for making your gesture respectful, thoughtful, and well-received. Knives can be significant gifts that symbolize protection, strength, and skill, but they come with unique superstitions and traditions that require careful handling. 

Research emphasizes the importance of thoughtful gestures like including a coin, selecting a knife that aligns with the recipient’s interests, and explaining the gift’s meaning to enhance its reception. Following these practices ensures that your knife gift is seen as an expression of care, respect, and thoughtfulness.

By observing proper etiquette, you’ll create a memorable experience and convey a message of strength and respect in a way that resonates with the recipient’s values and beliefs.

Read Also This: When Must a Knife Be Cleaned and Sanitized? Best Guide Of 2024